
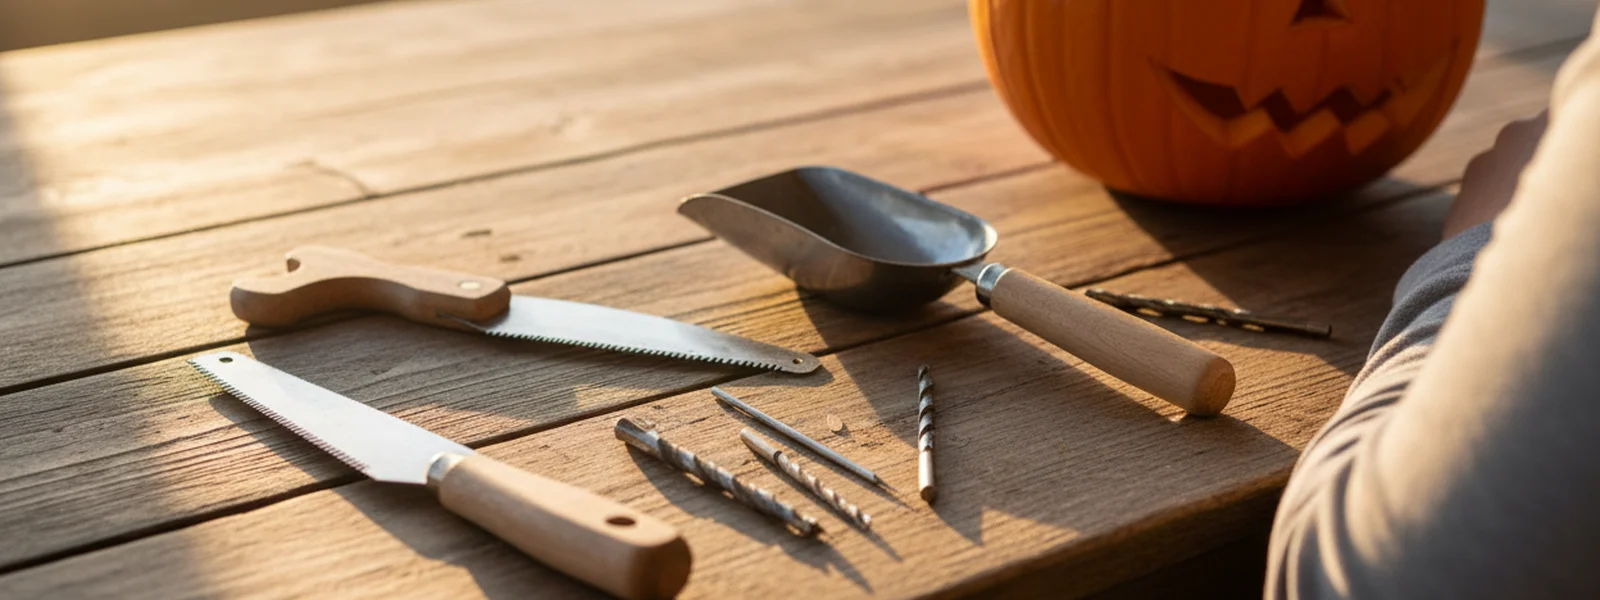
The Essential Toolkit: Your Guide to Pumpkin Carving Tools
There's a certain magic to carving a pumpkin. It's the moment when a simple gourd transforms into a jack-o'-lantern, ready to cast its warm glow on a crisp autumn evening. But achieving that perfect, or perfectly spooky, design often comes down to having the right tools. While you could technically use a kitchen knife, a dedicated set of pumpkin carving tools can make the process safer, easier, and infinitely more creative. Whether you're aiming for a simple, friendly face or an intricate, multi-layered masterpiece, understanding your options is the first step to a truly impressive jack-o'-lantern.
This guide will walk you through the essential gear for your pumpkin carving adventures. From basic kits to specialized attachments, we'll cover everything you need to know to choose the right tools for your carving style and effects. We'll also share tips for safe and effective use, ensuring your journey from pumpkin to polished jack-o'-lantern is as enjoyable as the final result.
Why Use Specialized Pumpkin Carving Tools?
You might be wondering, "Why can't I just use my kitchen knives?" While a sturdy chef's knife can certainly hack through a pumpkin rind, it's not designed for the intricate work required for detailed carving. Specialized pumpkin carving tools offer several advantages:
- Safety: Many carving tools have serrated edges designed for controlled cutting through thick rind, reducing the risk of slips compared to a broad kitchen knife. Tools with handles offer better grip and control.
- Precision: Tools like fine-tipped saws, etching needles, and drills allow for detailed work, creating patterns, textures, and designs that are difficult or impossible with standard kitchenware.
- Efficiency: Specialized scoops make gutting the pumpkin quicker, while power tools can speed up intricate cuts or create unique textures.
- Variety: The range of tools available means you can achieve a wide array of effects, from clean cut-outs to shaded textures and fine details.
Having the right gear means less frustration and more creative freedom. It transforms carving from a chore into a genuinely enjoyable part of the fall season. For those who really get into it, exploring options like a dremel for pumpkins or specialized drill bits can open up a whole new world of design possibilities.
The Essential Pumpkin Carving Kit: What to Look For
Most beginner-friendly pumpkin carving kits include a core set of tools that cover the basics. When selecting a kit, consider the following:
Scoops and Etching Tools
Before you can carve, you need to clear out the insides. A good scoop is crucial for this messy but necessary step. Look for a scoop with a sturdy handle and a sharp, curved edge. These are designed to efficiently scrape seeds and pulp from the pumpkin walls. Some kits also include smaller etching tools or linoleum cutters. These are fantastic for scraping away the surface layer of the pumpkin rind to create shaded effects, rather than cutting all the way through. This technique allows for more nuanced designs, adding depth and realism to your jack-o'-lantern.
Serrated Saws
These are the workhorses of most pumpkin carving kits. They resemble small coping saws or drywall saws, but are typically shorter and have finer teeth. The serrated edge is perfect for sawing through the thick pumpkin wall with controlled movements. They allow for clean, precise cuts, making them ideal for cutting out shapes like eyes, noses, mouths, or even more complex patterns. Some kits offer a variety of saw sizes, from larger ones for big cuts to finer ones for delicate details.
Drill Bits and Small Punches
For creating patterns of dots or small shapes, a set of drill bits or small punches can be incredibly useful. A scoop knife drill attachment for a power drill can quickly create a series of uniform holes. Alternatively, small, sharp punches can be tapped through the rind to create stippled effects or small openings. These tools are excellent for adding texture, simulating stars, or creating a more ethereal glow from within the pumpkin.
Stencils and Transfer Tools
While not tools in the cutting sense, stencils are invaluable for achieving specific designs. Many kits come with a selection of stencils, from simple shapes to more complex images. You can also find countless free printable stencils online. To transfer your chosen design onto the pumpkin, you'll typically use a transfer tool or a simple poker. A poker tool with a fine, sharp point is used to poke a series of dots along the lines of your stencil onto the pumpkin's surface, creating a guide for your carving.
Advanced Techniques and Power Tools
Once you've mastered the basics, you might be ready to explore more advanced techniques. This is where power tools can truly shine, offering speed and unique capabilities.
The Dremel for Pumpkins
A rotary tool like a Dremel is a game-changer for serious pumpkin carvers. With a variety of bits, you can:
- Etch and Shave: Use carving or grinding bits to shave away layers of the pumpkin rind, creating subtle shading and depth without cutting all the way through. This allows for realistic features and textures.
- Cut Intricate Shapes: Small cutting bits can create incredibly detailed cut-outs that are impossible with a hand saw.
- Create Patterns: Use bits to engrave patterns, lines, or even write text directly onto the pumpkin surface.
When using a Dremel, always wear safety glasses to protect your eyes from flying pumpkin debris. Start with lower speeds and experiment on a scrap piece or an inconspicuous area first. Remember to secure your pumpkin so it doesn't move while you're working.
Power Scoops and Drills
For those carving multiple pumpkins or dealing with particularly large gourds, a power scoop can be a lifesaver. These attachments for drills or dedicated electric tools make quick work of clearing out the seeds and pulp. Similarly, drill attachments designed for pumpkin carving can rapidly create dot patterns or small openings, adding a unique flair to your designs.
Safety First: Carving with Confidence
Pumpkin carving should be a fun and safe activity for everyone involved. Here are some essential safety tips:
- Adult Supervision: Always supervise children when they are using carving tools, especially sharp ones or power tools.
- Stable Surface: Ensure your pumpkin is on a stable, non-slip surface. Placing it on a damp cloth can help prevent it from sliding.
- Cut Away From Yourself: Always direct your cuts away from your body and hands.
- Use Gentle Pressure: Let the tools do the work. Forcing a tool can lead to slips and injuries.
- Proper Tool Storage: Store sharp tools safely when not in use, preferably in a case or with protective covers.
- Clean Up Safely: Dispose of pumpkin guts and seeds responsibly. Clean your tools thoroughly after use.
If you're new to carving, starting with a cute pumpkin shirt and a simple design is a great way to get comfortable. For a more involved project, consider looking at some of our jack-o'-lantern shirts for inspiration, but always prioritize safety.
Choosing the Right Tools for Your Style
The best tools for you depend on the kind of jack-o'-lantern you envision. For simple, classic designs, a basic kit with a scoop and a few saws will suffice. If you're aiming for elaborate, shaded carvings or intricate patterns, investing in a rotary tool and specialized bits will be well worth it. Remember, even simple tools can create amazing results with a bit of patience and creativity. For those who love the classic carved look, a shirt from our Jack-o'-Lantern Shirts collection might be the perfect inspiration.
Don't forget that the pumpkin itself plays a role! A good, firm pumpkin with smooth skin is easier to carve and will hold its shape better. For inspiration on different pumpkin varieties, you might find our articles on heirloom pumpkins interesting. And if you're looking for a cozy outfit for your carving session, check out our Pumpkin Sweatshirts.
Beyond the Carving: Preserving Your Jack-o'-Lantern
Once you've finished your masterpiece, you'll want it to last. A few tricks can help extend the life of your carved pumpkin:
- Clean Thoroughly: Remove all seeds and pulp.
- Petroleum Jelly: Apply petroleum jelly to the cut edges of the pumpkin, inside and out. This helps to seal in moisture.
- Bleach Solution: A diluted bleach solution (1 tablespoon bleach per quart of water) can be sprayed inside the pumpkin to kill mold and bacteria. Let it air dry before lighting.
- Keep it Cool: Store your carved pumpkin in a cool place, away from direct sunlight and heat.
For those who love the artistic side of pumpkins, our Heirloom Pumpkin Shirts collection features designs inspired by the unique beauty of different pumpkin varieties. And if you're planning a pumpkin patch visit, our Pumpkin Patch Shirts are perfect for the occasion.
Conclusion: Your Jack-o'-Lantern Awaits
Having the right pumpkin carving tools can transform your Halloween decorating from a chore into a creative ritual. Whether you prefer the simplicity of hand saws or the precision of a Dremel, there's a tool out there to help you bring your vision to life. Remember to prioritize safety, have fun, and don't be afraid to experiment. The perfect jack-o'-lantern is just a few careful cuts away, and a great pumpkin shirt can make the whole experience even better!
Ready to get carving? Make sure you have your tools, your pumpkin, and perhaps a cozy new shirt from our All Pumpkin Shirts collection to wear while you work. Happy carving!

Published by Pumpkin Shirts
The pumpkin is the point.
Frequently Asked Questions
What are the most important pumpkin carving tools for beginners?
For beginners, a basic kit usually includes a good scoop for cleaning out the inside, a serrated saw for cutting shapes, and possibly a poker tool for transferring designs. These cover the essential steps for creating a classic jack-o'-lantern.
Can I use a Dremel for pumpkin carving?
Yes, a Dremel or other rotary tool is excellent for advanced pumpkin carving. It allows for intricate details, shading, and etching that are difficult to achieve with hand tools. Always use safety glasses and start with lower speeds.
How do I make my carved pumpkin last longer?
To preserve your jack-o'-lantern, clean out all seeds and pulp, apply petroleum jelly to cut edges to seal moisture, and consider spraying the inside with a diluted bleach solution to prevent mold. Storing it in a cool place also helps.
What's the difference between a carving saw and a kitchen knife for pumpkins?
Pumpkin carving saws have finer, serrated teeth designed for controlled cuts through thick rind, reducing slipping hazards. Kitchen knives are broader and less precise for detailed work, increasing the risk of accidents.
Are there tools for creating shaded effects on pumpkins?
Yes, tools like linoleum cutters, etching needles, or specific Dremel bits are perfect for scraping away the pumpkin's surface layer. This technique creates shaded areas and depth without cutting all the way through, adding realism to your designs.
How do I transfer a design onto a pumpkin?
You can use stencils, which are often included in carving kits or available online. To transfer the design, use a poker tool or a fine-tipped marker to poke dots along the stencil lines onto the pumpkin's surface, creating a guide for carving.
First Look at New Pumpkin Designs
New illustrations, patch stories, and heirloom variety guides — straight to your inbox before anyone else sees them.